No products
BLOG NEWS
Search on blog
Follow us on facebook
Top sellers
-

Proto Shield Plus STARTER KIT
This kit is the ideal solution for those who want to start to prototype...
69,90 € -

Proto Shield Plus LCD KIT
Prototype with ARDUINO / GENUINO boards without having a lot of wires...
56,00 € -

SMD to breadboard adapter (10 pcs pack)
Easily adapt SMD devices to 2.54mm prototyping breadboards.
3,90 € -

Proto Shield Plus BASE KIT
Prototype with ARDUINO / GENUINO boards without having a lot of wires...
52,00 €
Using a Servo with the Proto Shield Plus
Published : 05/09/2018 10:09:51
Categories : Proto Shield Plus
USING A SERVO WITH THE PROTO SHIELD PLUS
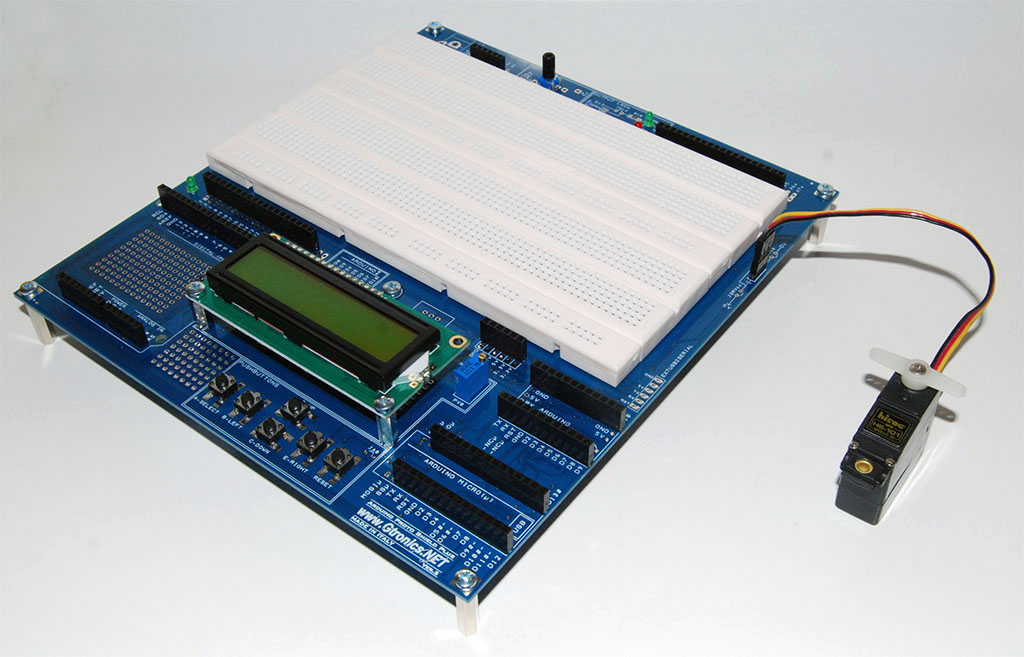
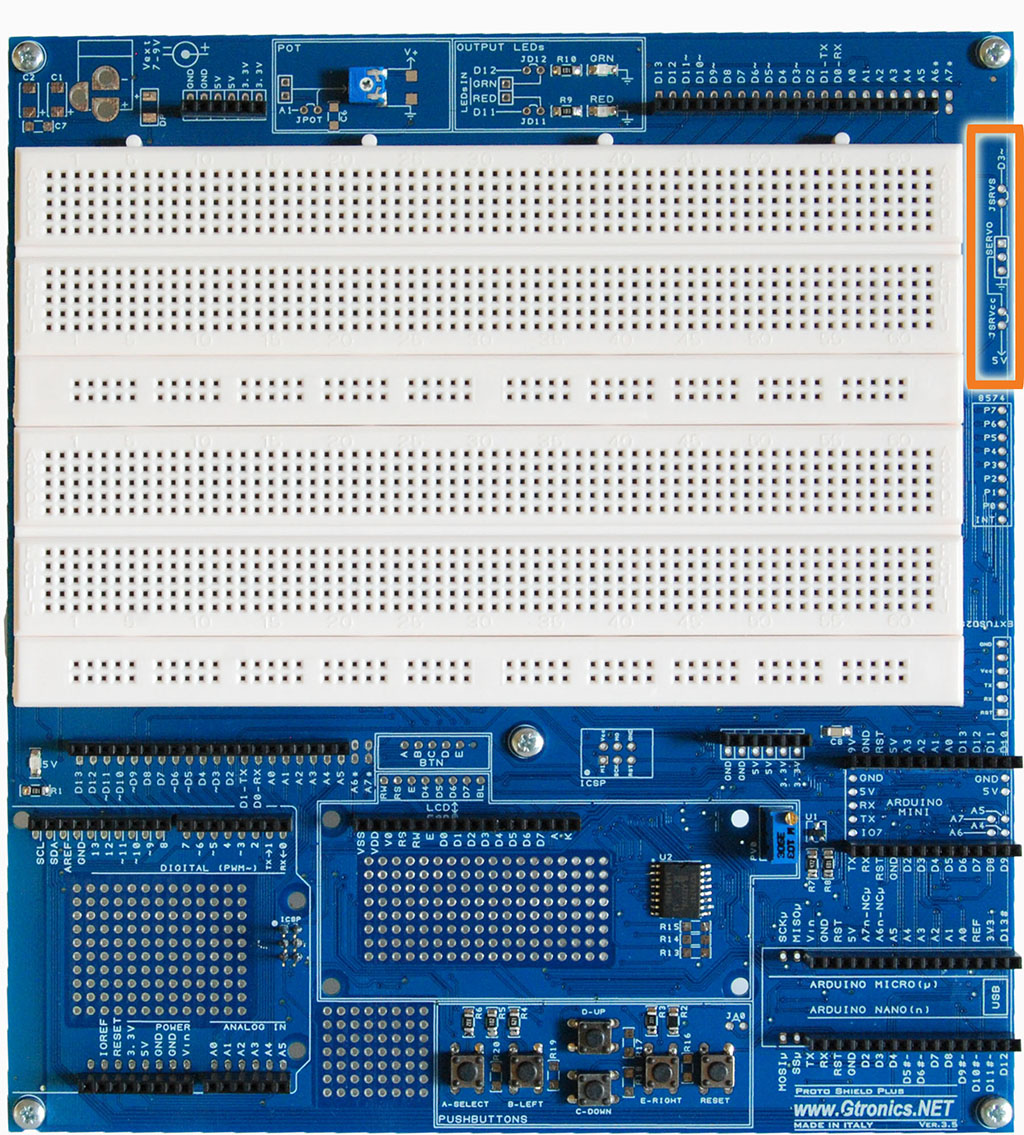
The SERVO predisposition is useful if you want to quickly experiment with a standard 5V hobby servo.
To connect a servo you need to solder a standard 2,54mm 3 pins single row male header (not provided with the board).
Servo Power Supply connects by default to on-board 5V (by means of SJSRVcc, closed by default).
Servo control signal connects by default to digital pin 3 (by means of SJSRVS, closed by default).
Refer to the APSP_servo sketch in the APSP_Sample_Projects_V3.zip file (Click here to download).
Standard hobby servo connected to the SERVO header
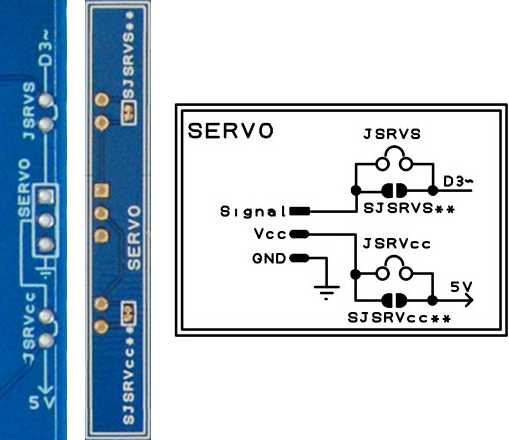
Using the SERVO with a different digital pin
Cut SJSRVS in the middle to disconnect D3 pin from the SERVO signal pad.
Connect your desired PWM Digital pin to the pad marked in yellow in the picture below.
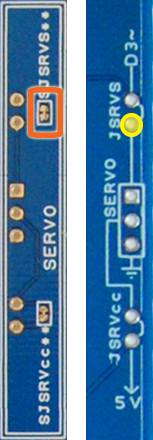
If you want to easily connect and disconnect the servo from D3 pin, you can add a male 2.54 pitch 1x2 pin strip connector to JSRVS pads and use a jumper to connect / disconnect D3.
Powering the SERVO with an external power supply
Cut SJSRVcc in the middle to disconnect 5V from the SERVO power pad.
Connect your external power supply ground (GND) to a free GND pad of the Proto Shield Plus.
Connect the positive pole of your external power supply to the pad marked in red in the picture below, be sure that SJSRVcc is OPEN to avoid damage on the Arduino board.
CHECK YOUR SERVO SPECIFICATIONS in order not to damage the servo.
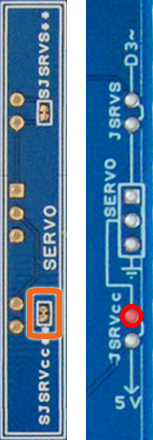
If you want to easily swap the SERVO power supply from on-board 5V to external 5V, you can add a male 2.54 pitch 1x2 pin strip connector to JSRVcc pads and use a jumper to power the SERVO with the on-board 5V and use a female header wire to connect the external 5V power supply to the pad marked in red.
The Proto Shield Plus Board Layout
Read more
Published : 03/09/2018 10:45:38

 USING A 16x2 LCD DISPLAY WITH THE IoT PROTO SHIELD PLUS
  What does Paolo Aliverti say about the IoT Proto Shield Plus?
  USING AN SSD1306 128x32 OLED DISPLAY (I2C type) WITH THE IoT PROTO SHIELD PLUS
  USING AN SSD1306 128x64 OLED DISPLAY (I2C type) WITH THE IoT PROTO SHIELD PLUS
  I2C Bus on the IoT Proto Shield Plus